This bundle provides the foundational items needed to connect multiple solar panels in series. It is designed for beginners looking to understand and implement a series solar panel configuration. The products collectively enable the safe installation, connection, and voltage management of a multi-panel solar setup.
Curated by The Shelf Curator · Updated June 2026
Built for off-grid beginners planning a small-scale 12V or 24V expansion who need a streamlined kit for wiring panels in series to increase voltage. Not for commercial rooftop installations — this shop focuses on portable and DIY van or cabin setups.
Curator's pick: Rover Li 40 Amp DC Input MPPT Charge Controller
While panels get the attention, this controller is the actual brain; it handles the higher voltage from series strings more efficiently than PWM alternatives and doesn't overheat when you push the 40-amp limit.
⚠ Worth knowing: Setting up in series increases voltage, which means if one panel is partially shaded, the output of the entire string drops significantly. If your mounting spot has frequent shadow interference from trees or roof racks, a parallel setup is more forgiving despite the heavier wiring requirements.
Sizing Your First Deep Cycle Battery BankPortable Solar Generators for Weekend CampingInverters for Small Scale Off-Grid Living
This shop is built from the foundational items needed to connect multiple solar panels in series, designed specifically for beginners. It provides everything necessary for the safe installation, connection, and voltage management of a multi-panel solar setup. The selected components ensure compatibility and ease of use for those new to solar DIY projects.
This guide is for aspiring solar enthusiasts, DIYers, and homeowners looking to expand their solar power knowledge and setup. It's ideal for someone who wants to understand how series connections work to achieve higher voltage for applications like RVs, off-grid cabins, or small home auxiliary power systems, particularly when charging batteries efficiently.
Starting with a single panel, cables, and charge controller offers an entry point, costing about $215-$300. A full build, including all tools and mounting, ranges from $280-$400, offering a complete and robust solar series connection system.
Full build
$280–$400
Starter
$215–$300
Panel, cables, and charge controller
Best forDIY Solar EnthusiastsOff-Grid Power SystemsRV Solar SetupsEducational ProjectsBattery Charging Efficiency
This 100W 12V monocrystalline solar panel is a high-efficiency panel suitable for expanding solar power systems. It is often used in multi-panel series configurations, making it a good choice for those new to solar DIY projects. This panel converts sunlight directly into electricity to charge batteries or power devices.
100 Watts power output
12 Volt nominal system compatibility
Monocrystalline silicon cells
High efficiency for compact size
Durable, weather-resistant construction
In this shop: The Renogy 100W Monocrystalline Solar Panel forms the base of any multi-panel series setup, directly aligning with the shop's focus on foundational solar components for beginners.
These Solar Panel Extension Cables with MC4 Connectors are used for extending the reach of solar panels and connecting them in series. They ensure a secure and watertight connection between panels and other system components, such as a charge controller. These cables are essential for flexible panel placement and configuration.
MC4 male/female connectors
UV and weather resistant insulation
Standard solar cable gauges
Multiple length options available
Low resistance for power transfer
In this shop: These cables are vital for practical series connections, perfectly fitting the shop's emphasis on essential components for successful solar configurations.
The Rover Li 40 Amp DC Input MPPT Charge Controller efficiently manages power flow from solar panels to batteries. It optimizes the voltage and current from a series array to safely charge a battery bank. This device is necessary for converting the higher voltage of series-connected panels to a usable charging voltage for batteries.
40 Amp charge capacity
MPPT (Maximum Power Point Tracking)
Handles higher series voltage
LCD display for system monitoring
Multiple battery type support
In this shop: An MPPT charge controller like the Rover Li 40 Amp is central to managing the higher voltages inherent in a Renogy series setup, embodying the shop's technical focus.
This Solar MC4 Connector Assembly Tool Kit provides the necessary tools for crimping and tightening MC4 connectors. It allows DIYers to create reliable and safe connections for their solar wiring. Proper use of this kit helps ensure optimal conductivity and weather sealing for series panel installations.
MC4 crimping tool included
Spanner wrenches for tightening
Wire strippers and cutters
Durable carrying case
Essential for secure connections
In this shop: This tool kit underscores the Renogy shop's commitment to enabling DIY success, providing the means for proper installation of series-wired panels.
A Digital Multimeter for Solar Testing is an instrument used to measure voltage, current, and resistance in electrical circuits. It is essential for verifying the output and continuity of solar panels and wiring after assembly. This tool helps identify wiring errors and confirms the cumulative voltage of series-connected panels.
Measures DC voltage and current
Measures resistance and continuity
LCD digital display
Safe for solar system testing
Battery powered operation
In this shop: This multimeter is fundamental for diagnosing and confirming the integrity of a Renogy series solar setup, aligning with the shop's practical, self-reliant approach.
The Z-Bracket Solar Panel Mounting Kit provides a simple and secure method for installing solar panels onto various surfaces. It is suitable for mounting individual or series-connected panels on RVs, boats, or rooftops. This hardware ensures panels are stably positioned to optimize sun exposure.
Aluminum Z-brackets
Stainless steel fasteners
Corrosion-resistant
Easy installation process
Supports multiple panel sizes
In this shop: The Z-Bracket Mounting Kit offers a practical solution for securing Renogy panels, fitting the shop's emphasis on complete and functional series solar installations.
This bundle allows you to achieve higher voltage outputs from your solar array, which is crucial for efficient charging of battery banks and for reducing power loss over longer cable runs.
By providing all the necessary components for series connection, this setup simplifies the learning curve for beginners and ensures that all parts are designed to work together seamlessly.
The comprehensive tool kit and multimeter included enable safe and reliable installation, empowering users to troubleshoot and confirm proper operation of their solar system independently.
What to know
Series connections result in higher voltage, which requires careful handling and adherence to safety protocols to avoid electrical hazards during installation and maintenance.
If one panel in a series circuit is shaded or malfunctions, the output of the entire array can be significantly reduced, impacting overall system performance.
How to use this together
1
Mount Your Solar Panels
Begin by securely mounting your 100W 12V Monocrystalline Solar Panel(s) using the Z-Bracket Solar Panel Mounting Kit. Ensure the panels are positioned to receive maximum sunlight, as proper placement is critical for optimal power generation and prevents shading issues that can reduce efficiency when connected in series.
2
Connect Panels in Series
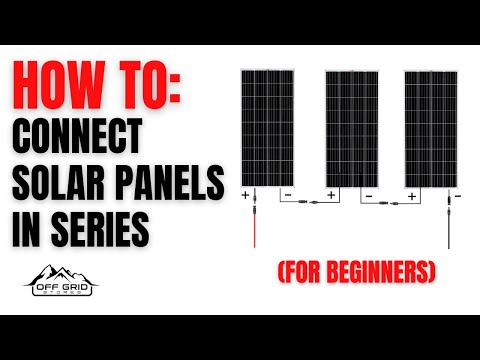
Use the Solar Panel Extension Cables with MC4 Connectors to link your panels in series. Connect the positive terminal of one panel to the negative terminal of the next panel, following safe wiring practices. For any custom wiring, use the Solar MC4 Connector Assembly Tool Kit to ensure secure and waterproof connections, which is vital for long-term reliability.
3
Verify Series Voltage
Before connecting to the charge controller, use the Digital Multimeter for Solar Testing to measure the total open-circuit voltage (Voc) of your series-connected panels. This step confirms that your series wiring is correct and that the combined voltage is within the operating range of your Rover Li 40 Amp DC Input MPPT Charge Controller, ensuring system compatibility and preventing damage.
4
Connect to Charge Controller
Connect your series array to the solar input terminals of the Rover Li 40 Amp DC Input MPPT Charge Controller. Ensure the polarity is correct (positive to positive, negative to negative). This MPPT charge controller is essential for efficiently converting the high voltage from your series-connected panels into a safe, usable voltage for charging your battery bank, optimizing power transfer and protecting your batteries.